So last June I took the stack of worn out jeans in my daughters closet and decided to turn them into summer shorts instead of throwing them away. I took a few pictures of the process and when I was done I posted them to my Facebook account to share the idea with friends! For the next several months I received continuous requests for a tutorial, I kept promising I would but it always got pushed to the bottom of my ever growing to do list. However for this last week spring has been teasing me, and causing me to dream of ditching the boots and jeans for some shorts and flip flops. So I went in search of these shorts only to remember that my daughter had long since grown out of them and we had given away to her younger cousin. BUT.... then I found one pair in her most current giveaway bag, YAY! After all that searching I still decided it would be easier to just start over and make another pair--rather than take the old ones apart to show the steps. This time I made a wider band to try a different look. I like them both...which is your favorite?

Supplies Needed:
- Sewing machine
- Colorful fabric (1/3 yard for wide band---1/4 yard for narrower band)
- Matching thread.
- Old worn out jeans (make sure they still fit the waist, my darling girl exaggerated how well hers fit and she grew out of them before the summer ended. Oh well...she wore them a few times now her cute cousin gets to enjoy them.)
Let's Get Started!!
Step 1: Determine your inseam and mark a cutting line
Step 2: Cut off the pant leg
Step 3: Use the cut off portion to measure and mark the other leg so they are equal lengths.
NEXT
Step 4: Determine how wide you want your band. You should probably do this before you purchase fabric...but since I was using fabric from my stash it didn't matter.
NEXT
Step 5: Determine your strip length. As you can see my pant leg is 6.5 inches wide (I rounded up to 7 just to be safe) plus I need 6 inches of extra length for each side (6 for front tie and 6 for the back tie). 7x2=14+12=26 (this equation works good for the narrow ties)
BUT....
I made my strips 28 inches long by 6 inches wide. (I added the extra inches to the length because my ties are wider and I wanted to account for the added bulk)
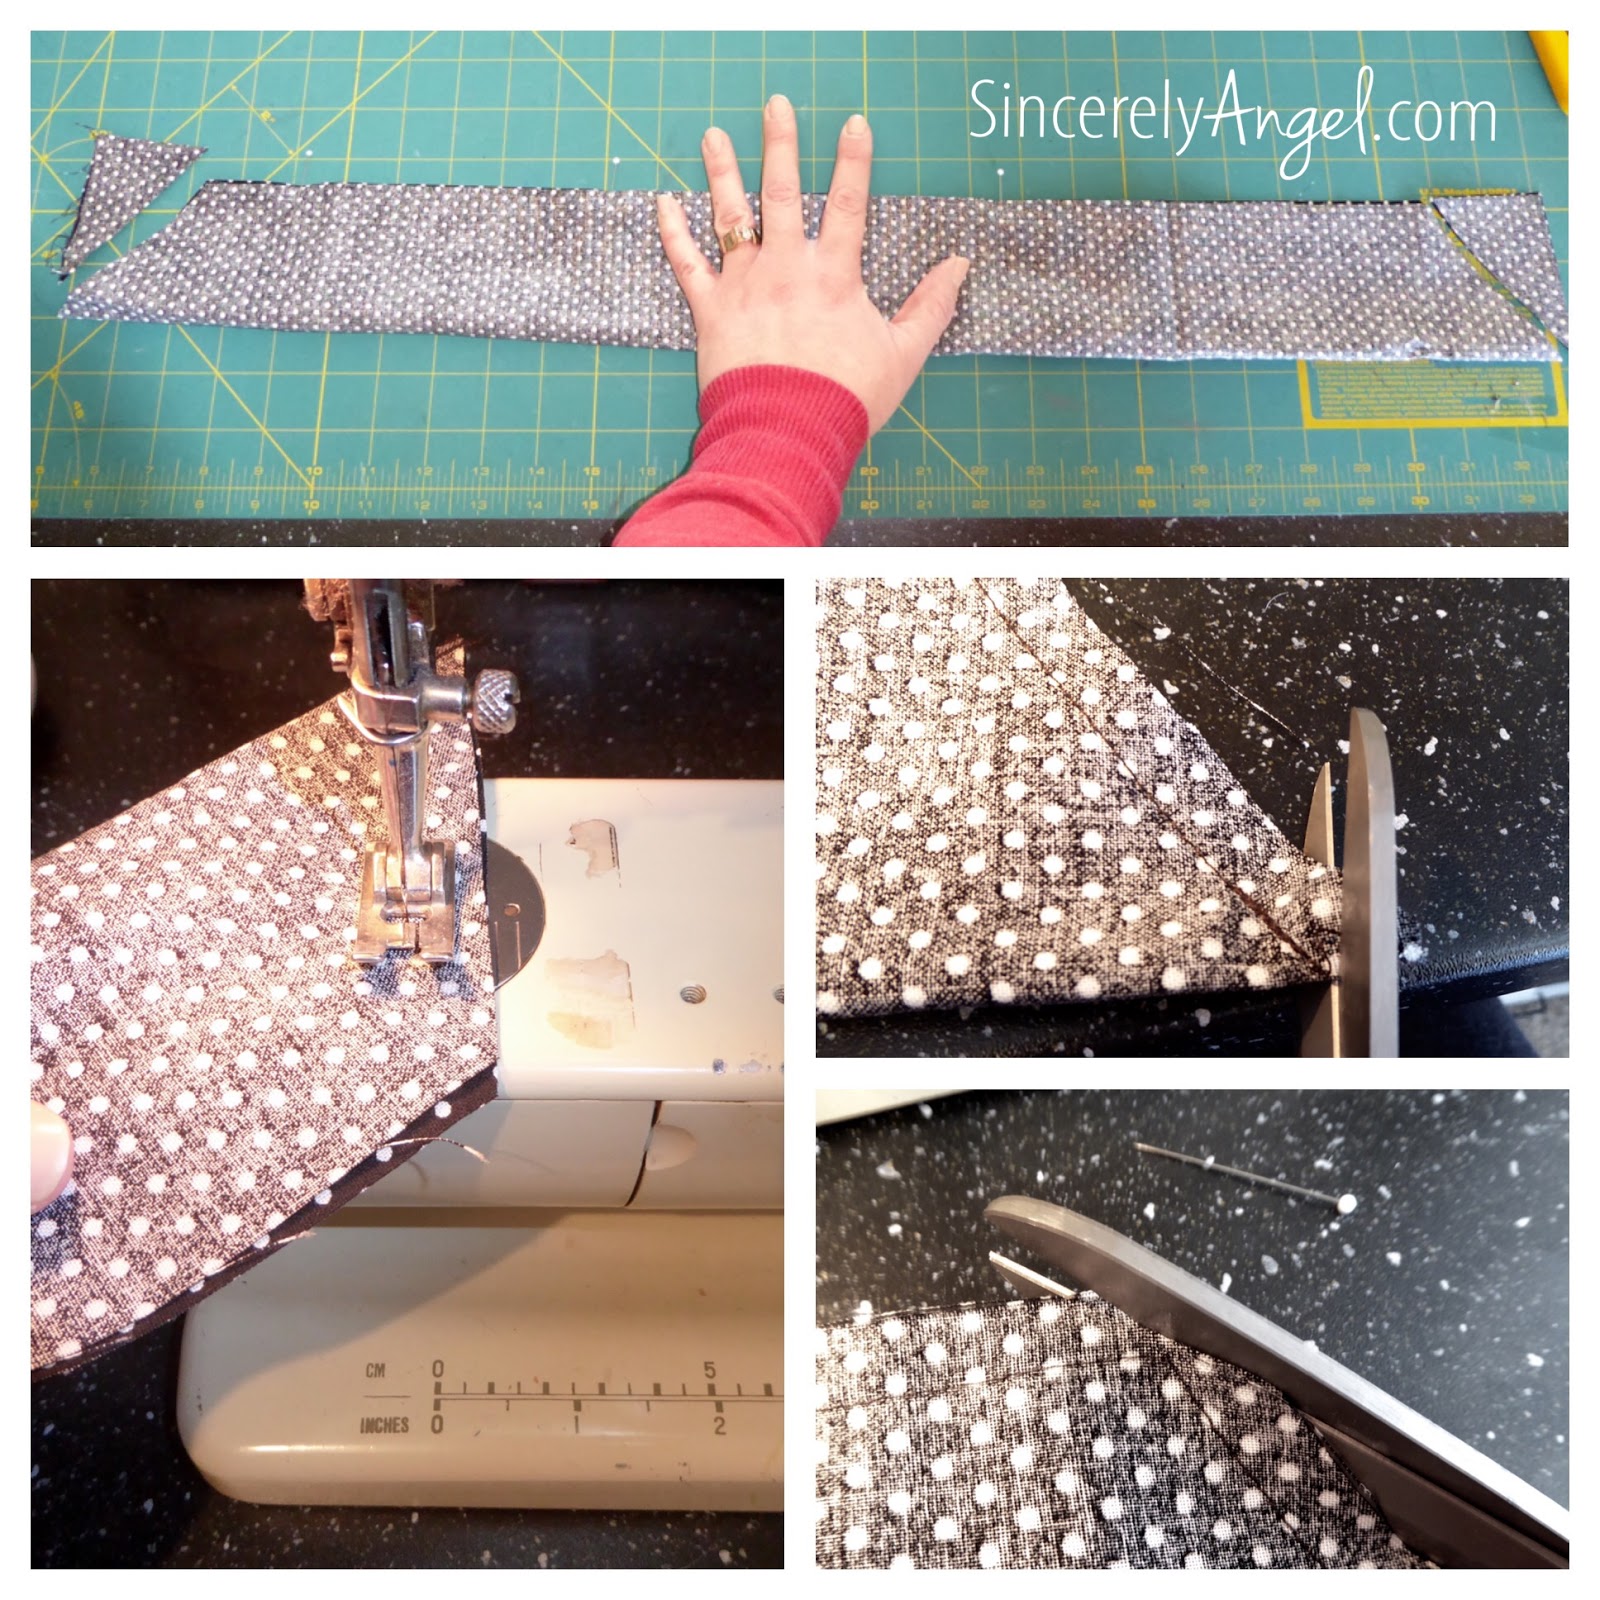
Step 6: Cut 2 strips to your desired length and width. Mine were 6"x28"
Step 7: Fold them lengthwise with right sides together.
WE ARE COMING RIGHT ALONG!
Step 8: Trim the end of the strips at an angle see the picture above. This is what helps your tie to look like a bow.
Step 9: Pin the edges and sew the strip. Be certain to leave an opening 6 inches wide in the middle of the strip. (See where my hand is stretched out in the above picture. Leave that area open for turning the strip.
Step 10: After sewing trim the corners to reduce bulk, just be careful to get close but not too close!
WAHOO GETTING CLOSER!
Step 11: Now you are going to turn your strips right side out. I think a pencil is a great helper with this, the eraser grabs the fabric making it easier to push it through and the pencil point(not too sharp) is great for helping push the corner out to get it to a nice crisp point.
Now time to get the iron out and heat it up!
Step 12: Tucking the seams into the strip iron them nice and flat. The open seams will get stitched down when we sew them onto the jeans.
Step 13: Fold the strip in half (make sure the open seam is pointing up where you are pinning so it gets sewn closed) wrap the strip around the pant leg, be sure the equal extra lengths are at the outside edge of the jean. Start pinning on outside edge and work your way around the pant leg. There should be about and 1.5 inch area where you have not pinned because this will be left open to enable you to tie the knot.
Step 14: Topstitch all the way around the top of the strip. Leaving the 1.5 or 2 inch opening to enable tying the knot. I did not finish the jeans at all, I tried to keep this as simple as possible because my 10 year old daughter wanted to do most of the sewing. (That said we didn't have any problem with the jeans fraying much at all.)
Now time to try them on!!
These ended up being almost a capri length which made me want to try some for me... I don't wear shorts much any more!
What do you think? If you try this tutorial out please comment and share your pictures so I can see all the cuteness!!